From Connie Fox.
Instructions for fundamental wire techniques in jewelry making.

Click
here to say thank you to her.
Connie makes an eye the same way I do. She rolls from the cut end of the wire then bends the eye to center it. Hers are much better than mine.
Most instructions I've seen say to make a 90 degree bend first. I find it more difficult to get the eyes all the same size with this method unless I slip a wire cutting jig onto the bent wire.
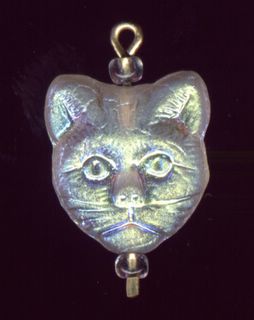
I used to do piecework beaded jewelry making in my spare time. The man who owned the company considered buying head pins a waste of material so we made our dangles with 22 gauge half hard wire and size 11 or 14 seed beads. Then crimped the end of the wire with the joint of the pliers to form a paddle that would not slip through the seed bead. An example is shown below.
First make the eye. Hold the eye and slip on the beads. Firm them up tight to the eye, cut the wire and crimp. This dangle is not from the jewelry company, it's my own earrings of cat face beads. Now that I see this enlarged image...this is not a good eye....it's oval and not fully closed.
I didn't say that I was good at working with wire just that I do the best I can! ;-)

Here is a picture of a couple of my pliers. Look at the joint to see the flat area I use to crimp the paddle end..
Click to see larger image.

I'm ham fisted and have problems marring the wire. My solution to this problem is shown on the pink set of pliers. I have made a little protector from shrink tubing that I got at Radio Shack. The tubing is used to bundle wires but works great for my use. I just cut a piece of the closest size tubing and used my heat gun to shrink the tubing to fit (a hairdryer will work too).
This little cap is removable and made my work so much easier.
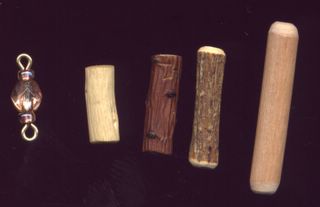
This is a picture of some of my wire cutting jigs. Aack.. the smallest one is buried on my table somewhere and not shown. These are made from wooden beads from the jewelry company but a red plastic coffee stirrer stick has a hole down the center, is easily cut to size and makes a great jig. All your wire pieces will be the same size. I use the smallest jig to cut the wire for the top eye when making a beaded link. That lightest jig is my perfect "s" hook.

Try as I might I have a hard time getting the second eye on a beaded link to be round. Maybe my jig needs to be a little bit longer.
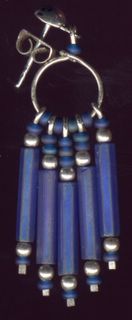
Making the circle that these dangles hang on is more difficult than it looks especially since there has to be a left and a right in a set of earrings. My tools for this were made by my boss when I worked at a small machine shop and are tool steel rods with a piece of a large paper clip stuck in a small drilled hole. If I were to need another one and had to make it myself I would use a dowel and a piece of paper clip.
These are my own earrings and not a design from the jewelry company.


To make the circles start by making an eye that is not fully closed. Place the eye over the hook on the tool, wrap the wire around and away from yourself for one and wrap towards yourself for the second of a set. Remove from the tool. Slip on the dangles. Bend the long end of the wire to 90 degrees, slip into the eye and close the eye. Add a bead, slip on a wire cutting jig and cut the wire. Form the top eye that attaches to the ear wire.