Transfer Ink Recipe
1 heaping teaspoon white granulated sugar
1 teaspoon boiling water
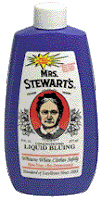
Mrs. Stewart's laundry bluing
Dissolve sugar in water and add bluing by drops until it's as dark as you want. I never measured so maybe it was about a quarter teaspoon.
P.S. This results in a very light transfer.
I have since seen a recipe that is equal portions sugar and bluing. 1/2 t. sugar dissolved in 1/2 t. liquid bluing .
Mrs. Stewart's laundry bluing is available in the supermarket in the laundry section. The bottle looks like this:

Print out or draw your design on tracing paper. Flip the drawing over and trace the design with your bluing/sugar ink. I use a Rapidograph drawing pen because it is fillable and comes with a variety of nib sizes.
It's the sugar that makes the ink stick to the paper and also to transfer when heated. Use a medium high setting when you press the transfer to your fabric. Be careful not to burn the sugar.
If I want a larger design I will use the pin prick method to trace the pattern. For this you will poke holes with a needle tool along all the design lines. An unthreaded sewing machine will do a good job of poking holes if the design is small enough to maneuver under the needle. Your pattern will have a smooth side and a poked side. Place the pattern smooth side up on the fabric and daub a bluing/water ink through the holes.
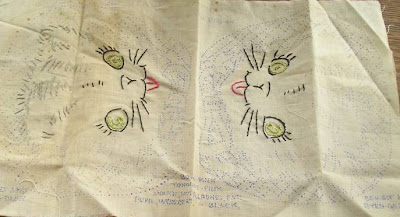
I snagged the following picture from eBay to illustrate a finished pattern. Click the picture for a larger version.

I have used the pin prick and bluing to mark a quilt top and had no problems with staining.

This is most excellent! My friend Kristie and I were talking recently about figuring out a way to do this but had not one single clue as where to begin. And here you've posted exactly what we wanted to know. You are brilliant!
ReplyDeleteI'm speechless! (Well, almost.) This is such a wonderful, helpful idea. I don't embroider a lot, but when I do, it's usually because I want to personalize a gift. This ingenious hint will make that always possible.
ReplyDeleteYou are such a treasure! Thanks for all you share with us!
~Mary
You are such an amazing, unbelievable, remarkable resource. Thank you so very much for this, I can not wait to go to the store and buy some bluing to try this out. You're a gem, xoxoxo!
ReplyDeleteThis is awesome! Thanks heaps for sharing it with us!
ReplyDeleteHave you tried to mark directly onto fabric? Thank you for sharing your formula !
ReplyDeleteMJ
No, I don't and this is why.
ReplyDeleteThe fibres of the fabric wick the bluing out from the line resulting in a raggedy, larger line. The only time to use the liquid directly to the fabric is with a pinpricked pattern and even then the dots will bleed larger but it works very well. If you do go direct to fabric you won't need the sugar. Bluing from the bottle wiped over the pinprick holes with a small piece of felt or t-shirt. Wear gloves.
Thanks so much for that - just brill. I've now just got to try it with an Aussi brand of laundry blue. Fingers crossed!
ReplyDeleteI've only just discovered your blog & will be here all night at this rate - just fantastic! I can't thank you enough for your enthusiasm & generosity
Wanted to let you know I posted a link to this tutorial today on my blog.
ReplyDeleteNancy Ward
PaperFriendly
http://www.nancywardcrafts.com
This is excellent! Thank you so much for posting this. It is exactly what I needed to know. I am off to buy some bluing.
ReplyDeleteI wonder if this solution can be injected into an empty inkjet ink cartridge? Print out the design you want and the ink will already be on the design when it comes out! Haven't tried it yet but I'm going to give it shot soon.
ReplyDelete