The handsome young man on the far right is my father.
Click for a larger view.
Friday, January 27, 2006
Tuesday, January 24, 2006
Monday, January 23, 2006
Happy Birthday Sister Sweetpea
This photo of my sister, P. and me was taken by our father shortly after we moved to California. He had sent it to my grandparents and on the back he wrote " These are the kids in front of the fence. They are standing where we now have sweetpeas coming up."
Happy birthday Sister. You're still a sweetpea.
Tuesday, January 17, 2006
Before Barbie
Before Barbie there was Lilli. I mentioned Lilli in Oct. '04 but that link no longer exists. Lilli was originally a cartoon character created by German cartoonist Reinhard Beuthien for a "filler" in June 24, 1952 for the newspaper Bild-Zeitung in Hamburg, Germany. She became very popular as a curvy gal who knew what she wanted and went about her business to get it. She was classy, sassy, fashionable (his wife Erika helped with the fashions) and desirable. After a short time Reinhard decided to produce a doll of this character and it was Max Weissbrodt from the famous Hausser/Elastolin company in Neustadt/Coburg, Germany who created and produced a doll to his satisfaction. On August 12, 1955 Lilli was first sold in Gemany.
Barbiedolls.de hosts a collection of Lilli cartoons. Click on the word Lilli under History, then click on cartoons. View the cartoons by year 1953 - 1962.
I see her as the original "naughty secretary".
Sunday, January 15, 2006
Penmanship
My own penmanship is terrible but I do admire it as art.
The online library of Rare Books on Calligraphy and Penmanship
hosted by The International Association of Master Penmen,Engrossers and Teachers of Handwriting.
"These books are no longer in print. Preserved in digital format, we offer them here in their entirety for current and future generations of calligraphers, penmen and pen artists. Enjoy."
Note: I wrote to thank them for maintaining this wonderful collection and this is the reply:
"Thanks for letting us know! We seldom hear from people about whether they like it or not, so I appreciate you writing!"
This image is in Real Pen Work Self-Instructor in Penmanship, Knowles and Maxim 1881
I found this through BibliOdyssey as recommended by Patricia.
Then Patricia scanned an entire French penmanship book that she is sharing on Grenouille Plus
Saturday, January 14, 2006
Fashion-Incubator
I want to share one of my favorite blogs with you.
Always interesting, always informative.
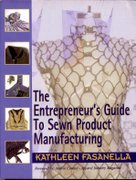
Kathleen Fasanella's Fashion-Incubator.
Kathleen is the author of
The Entrepreneur's Guide to Sewn Product Manufacturing.
She says "I'm an apparel industry pattern maker. As there is no licensing or credentialing of pattern makers in the industry, no one can be described as a "master pattern maker". Empirically, it's another story (usually to my boundless dismay); I prefer to be known as a steward. By steward I mean that I'm interested in all things related to pattern making. I collect the information, create information and do my best to make the information available in the interests of increasing professionalism of the trade. However, this site won't be strictly limited to pattern making and you'll find a myriad of personal and off-beat topics."
While the focus of Fashion-Incubator is designer-entrepreneurs in the sewn apparel industry I think there is good advice here for the designer-entrepreneurs of any product. Discussion of linesheets and dealing with retailers, hang tags etc. with tons of info about putting a line together that could also apply to your line of greeting cards for instance. There's also tutorials that have been of interest to me as a home sewer. Be sure to check her sidebars and see the depth of information she's shared. Kathleen's conversational style of writing and her wit make Fashion-Incubator a must read for me. She's a terrific teacher.
Friday, January 13, 2006
Vintage Postcards for Valentines
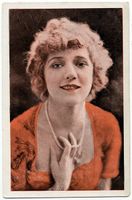
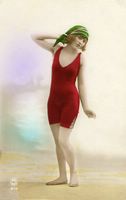
Some of these may be just the ticket for your valentines ;-)
Click the pictures for a larger image. Feel free to use them.
Would you be MY Valentine?
I've posted this one before but it cracks me up so here it is again.
This next one says:
En bavardant, sans qu'on s'en doute
L'amour nait au cours de la route
Not knowing much French I went to Babelfish but it didn't like the word nait.
The closest to a translation I could come was
While chattering, without one suspecting it
the love nait with the course during the road
Any help here? Patricia? Anybody speak French?
Note:
Dixie sent an e-mail with this tranlation.
Literal:
Chatting without suspecting
Love is born along the way
Idiomatic:
The gullible gossip will be seduced
Oh no!! LOL!! Not exactly suitable for a valentine. I'm giggling because my ignorance could really lead me into trouble! It's still a good image for some other project like advice to teenagers.
Thursday, January 12, 2006
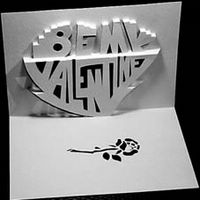
Pop Up Valentine patterns
From Marivi Garrido in Spain.
"These patterns can be used Royalty free but only for private use. Commercial use is not allowed"
Marivi is a very talented and generous paper engineer and is the first artist I found when I wanted to learn about pop up cards. On her home page scroll down to "Cards with Patterns" There are 3 pages of them and the ones marked with a red * are free for personal use.
Click the following pictures for direct links to these printable valentine patterns.
Note: I wrote to Marivi to thank her for sharing her patterns. I included a link back to this post. Here is her reply:
"Hi Kathy:
You are welcome!! Thank you for writing my name at your site, there is not many people with this kind of respect for author's rights.
I live in Spain, I use to live in Argentina some years ago.
Warmest regards, Marivi."
Wednesday, January 11, 2006
Bookplates and Seed Catalog
I've posted about this wonderful collection before but it's so huge that I enjoy returning to it.
Women Working, 1800 - 1930 focuses on the women's role in the United States economy and provides access to digitized historical, manuscript, and image resources selected from Harvard University's library and museum collections. The collection features approximately
500,000 digitized pages and images including:
* 7,500 pages of manuscripts
* 3,500 books and pamphlets
* 1,200 photographs
This is for fellow bookplate lover, Cin
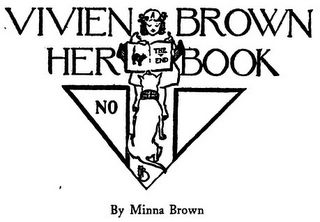
Women designers of book-plates.
Stone, Wilbur Macey. New York: Published for the Triptych by R.R. Beam, 1902. [91 pages.]
The Bookplates start with sequence #23.
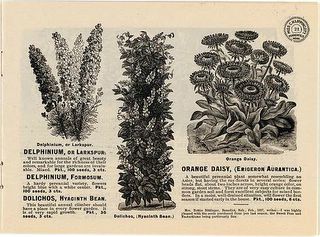
Flower seeds from Miss C.H. Lippincott,
319 & 323, Sixth St. S., Minneapolis, Minn.
[Minneapolis, Minn.: C.H. Lippincott, 1898] [52 pages.]
Then for your amusement...Be happy you aren't married to this Mere Man.
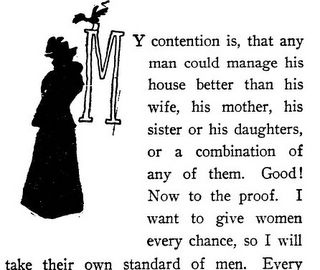
The Domestic Blunders of Women
Mere Man. New York: Funk & Wagnalls, 1900. [210 pages.]
Also there is a printable Women Working 2006/1893 calendar.
The link to the 7.6 MB PDF
is on the sidebar of the front page.
Tuesday, January 10, 2006
Build your own easel
Free plans from Benjamin Grosser. He says "Complete novice woodworking plans for building a fully-functional studio easel for less than $100 in materials using tools you’ll find in your basement or your friend’s garage. This easel is suitable for securing huge canvases and extendible to any size.Even if you’ve never built anything with your hands, I guarantee you can build this."
Click here to say thank you to him.
Saturday, January 07, 2006
Basic Wire Jewelry Skills
From Connie Fox.
Instructions for fundamental wire techniques in jewelry making.
Click here to say thank you to her.
Connie makes an eye the same way I do. She rolls from the cut end of the wire then bends the eye to center it. Hers are much better than mine.
Most instructions I've seen say to make a 90 degree bend first. I find it more difficult to get the eyes all the same size with this method unless I slip a wire cutting jig onto the bent wire.
I used to do piecework beaded jewelry making in my spare time. The man who owned the company considered buying head pins a waste of material so we made our dangles with 22 gauge half hard wire and size 11 or 14 seed beads. Then crimped the end of the wire with the joint of the pliers to form a paddle that would not slip through the seed bead. An example is shown below.
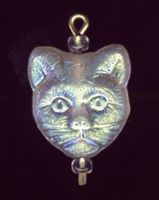
First make the eye. Hold the eye and slip on the beads. Firm them up tight to the eye, cut the wire and crimp. This dangle is not from the jewelry company, it's my own earrings of cat face beads. Now that I see this enlarged image...this is not a good eye....it's oval and not fully closed.
I didn't say that I was good at working with wire just that I do the best I can! ;-)
Here is a picture of a couple of my pliers. Look at the joint to see the flat area I use to crimp the paddle end..
Click to see larger image.
I'm ham fisted and have problems marring the wire. My solution to this problem is shown on the pink set of pliers. I have made a little protector from shrink tubing that I got at Radio Shack. The tubing is used to bundle wires but works great for my use. I just cut a piece of the closest size tubing and used my heat gun to shrink the tubing to fit (a hairdryer will work too).
This little cap is removable and made my work so much easier.
This is a picture of some of my wire cutting jigs. Aack.. the smallest one is buried on my table somewhere and not shown. These are made from wooden beads from the jewelry company but a red plastic coffee stirrer stick has a hole down the center, is easily cut to size and makes a great jig. All your wire pieces will be the same size. I use the smallest jig to cut the wire for the top eye when making a beaded link. That lightest jig is my perfect "s" hook.
Try as I might I have a hard time getting the second eye on a beaded link to be round. Maybe my jig needs to be a little bit longer.
Making the circle that these dangles hang on is more difficult than it looks especially since there has to be a left and a right in a set of earrings. My tools for this were made by my boss when I worked at a small machine shop and are tool steel rods with a piece of a large paper clip stuck in a small drilled hole. If I were to need another one and had to make it myself I would use a dowel and a piece of paper clip.
These are my own earrings and not a design from the jewelry company.
To make the circles start by making an eye that is not fully closed. Place the eye over the hook on the tool, wrap the wire around and away from yourself for one and wrap towards yourself for the second of a set. Remove from the tool. Slip on the dangles. Bend the long end of the wire to 90 degrees, slip into the eye and close the eye. Add a bead, slip on a wire cutting jig and cut the wire. Form the top eye that attaches to the ear wire.
Instructions for fundamental wire techniques in jewelry making.
Click here to say thank you to her.
Connie makes an eye the same way I do. She rolls from the cut end of the wire then bends the eye to center it. Hers are much better than mine.
Most instructions I've seen say to make a 90 degree bend first. I find it more difficult to get the eyes all the same size with this method unless I slip a wire cutting jig onto the bent wire.
I used to do piecework beaded jewelry making in my spare time. The man who owned the company considered buying head pins a waste of material so we made our dangles with 22 gauge half hard wire and size 11 or 14 seed beads. Then crimped the end of the wire with the joint of the pliers to form a paddle that would not slip through the seed bead. An example is shown below.
First make the eye. Hold the eye and slip on the beads. Firm them up tight to the eye, cut the wire and crimp. This dangle is not from the jewelry company, it's my own earrings of cat face beads. Now that I see this enlarged image...this is not a good eye....it's oval and not fully closed.
I didn't say that I was good at working with wire just that I do the best I can! ;-)
Here is a picture of a couple of my pliers. Look at the joint to see the flat area I use to crimp the paddle end..
Click to see larger image.
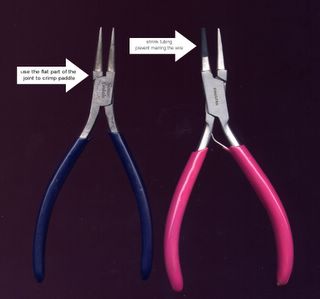
I'm ham fisted and have problems marring the wire. My solution to this problem is shown on the pink set of pliers. I have made a little protector from shrink tubing that I got at Radio Shack. The tubing is used to bundle wires but works great for my use. I just cut a piece of the closest size tubing and used my heat gun to shrink the tubing to fit (a hairdryer will work too).
This little cap is removable and made my work so much easier.
This is a picture of some of my wire cutting jigs. Aack.. the smallest one is buried on my table somewhere and not shown. These are made from wooden beads from the jewelry company but a red plastic coffee stirrer stick has a hole down the center, is easily cut to size and makes a great jig. All your wire pieces will be the same size. I use the smallest jig to cut the wire for the top eye when making a beaded link. That lightest jig is my perfect "s" hook.
Try as I might I have a hard time getting the second eye on a beaded link to be round. Maybe my jig needs to be a little bit longer.
Making the circle that these dangles hang on is more difficult than it looks especially since there has to be a left and a right in a set of earrings. My tools for this were made by my boss when I worked at a small machine shop and are tool steel rods with a piece of a large paper clip stuck in a small drilled hole. If I were to need another one and had to make it myself I would use a dowel and a piece of paper clip.
These are my own earrings and not a design from the jewelry company.
To make the circles start by making an eye that is not fully closed. Place the eye over the hook on the tool, wrap the wire around and away from yourself for one and wrap towards yourself for the second of a set. Remove from the tool. Slip on the dangles. Bend the long end of the wire to 90 degrees, slip into the eye and close the eye. Add a bead, slip on a wire cutting jig and cut the wire. Form the top eye that attaches to the ear wire.